communication-channels
Connecting Personal Inbox
(Gmail, Outlook, etc.)
Keeping track of client conversations can be tricky when you're juggling multiple inboxes. But don't worry—we've made it super easy to sync your Gmail or Outlook inbox right into leadest8. This means you'll see all your customer interactions in one unified place, so you'll never miss an important follow-up again.
Table of Contents
Connect Gmail or Outlook
Ready to streamline your email management? Here's how you can quickly connect your inbox:
Go to Settings > My Profile > Email (2-way sync).
Choose Gmail or Outlook, then click Connect.
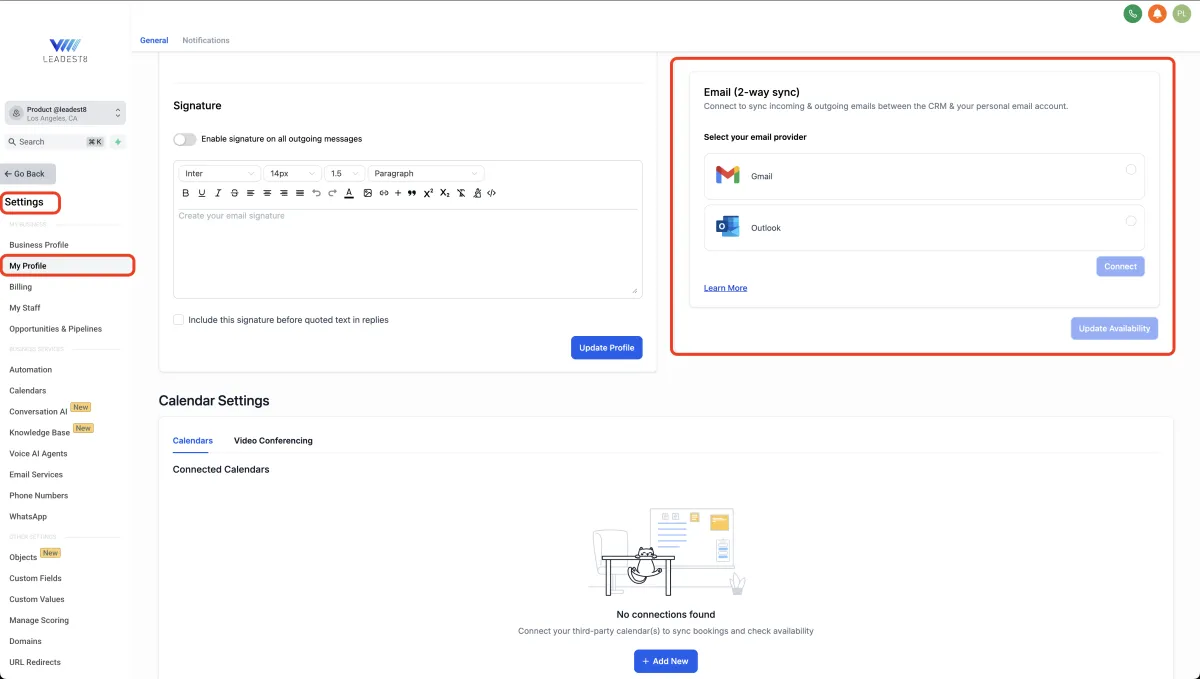
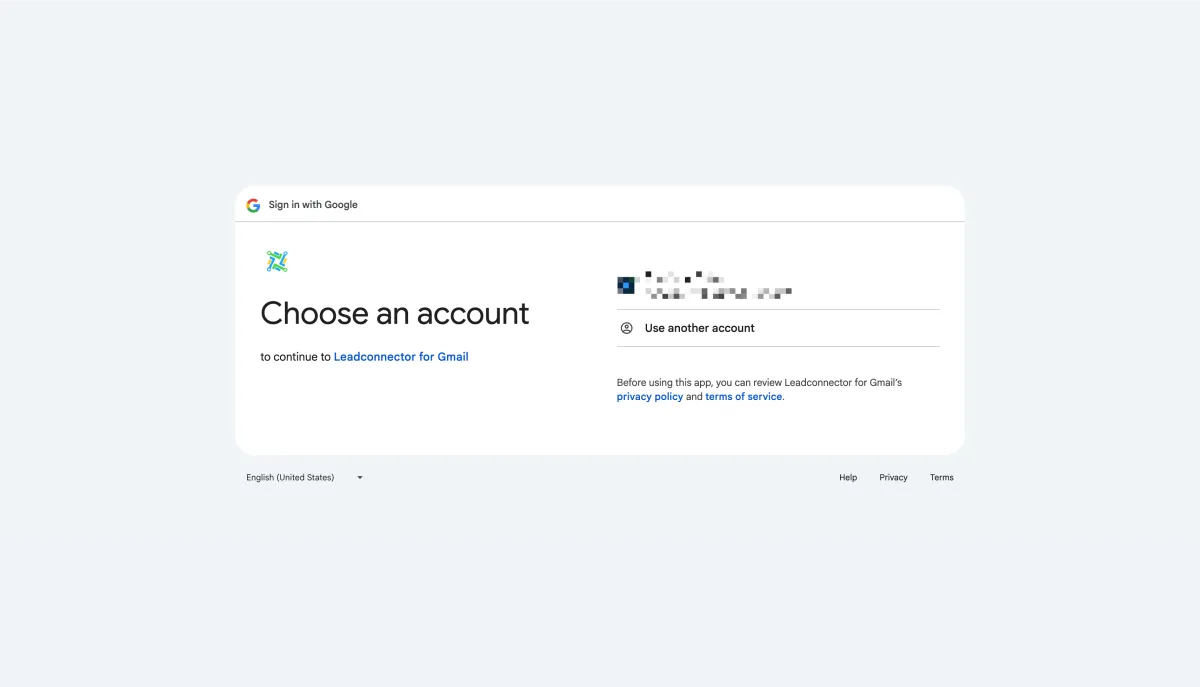
Follow the prompts to accept permissions. It's safe and secure!
Want some extra tips? Check out these helpful guides:
Next, you can start sending messages directly from within leadest8 to make your workflow even smoother.
Use Your Connected Email
Now that you've got your inbox connected, you're all set to manage your emails directly from leadest8. Here's how simple it is to start sending emails:
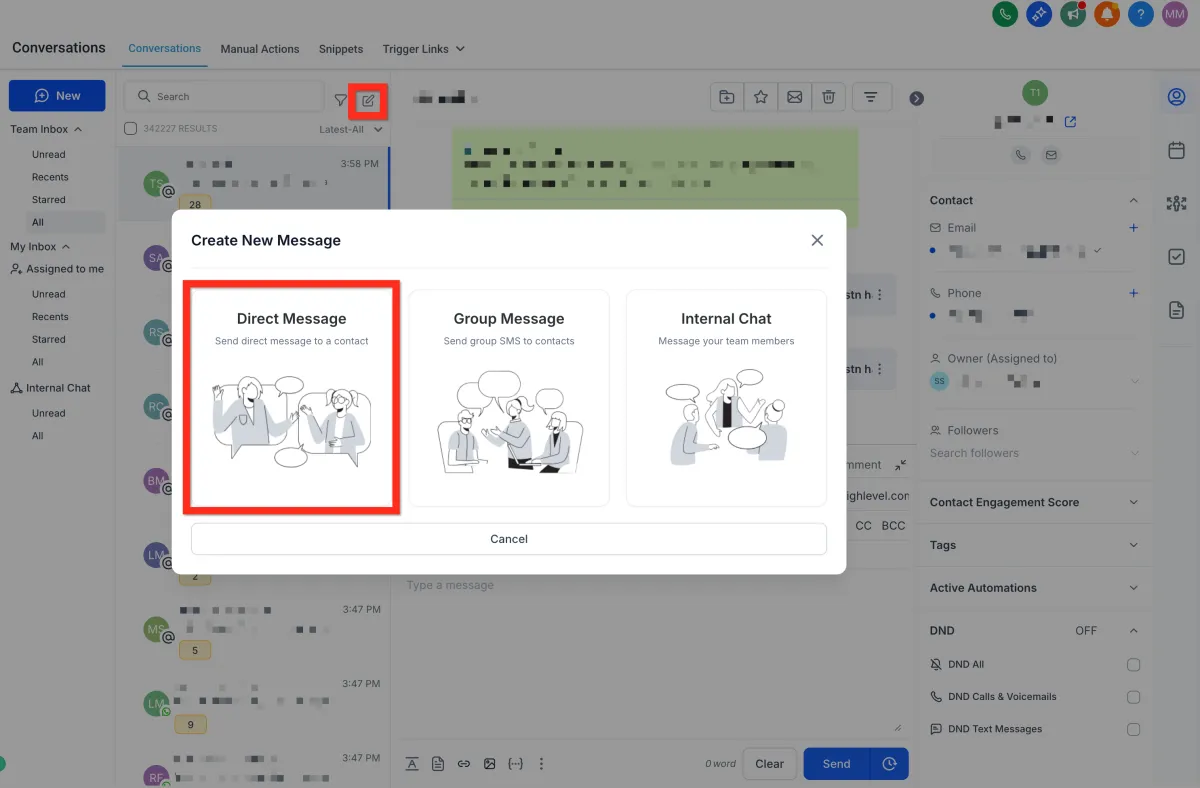
Navigate to Conversations.
Click on Create New Message (the pencil-on-paper icon).
Select Direct Message.
Choose your contact and click Continue.
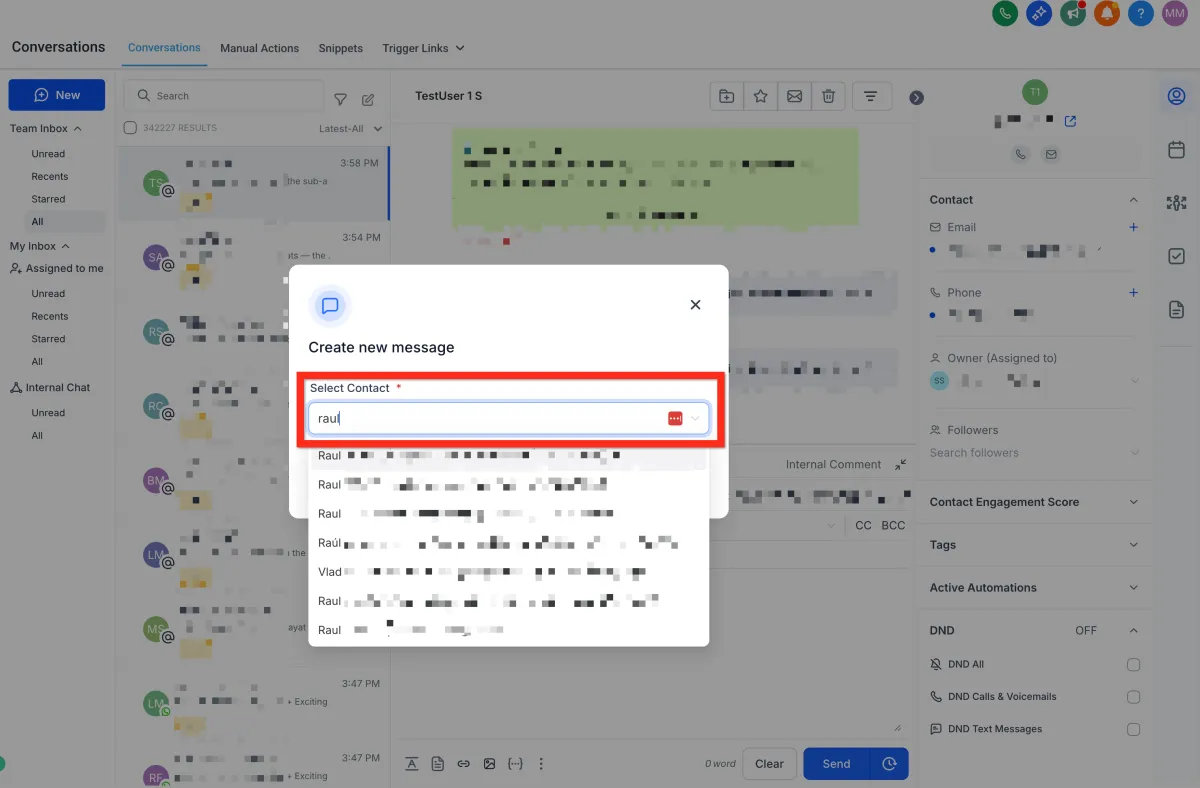
Your connected email address will automatically populate in the "From" field.
Your emails will seamlessly sync both ways—from leadest8 to your personal inbox and back again—so you're always in sync.
Setup Email, Phone, and SMS
Ready to amplify your customer communications? Connect your email, SMS, and phone services effortlessly and start engaging your audience on their favorite channels. Boost your response rates and customer satisfaction in just minutes.
Setup Email
Ensure your messages land in inboxes, not spam folders. Here's a simple way to set up your email service:
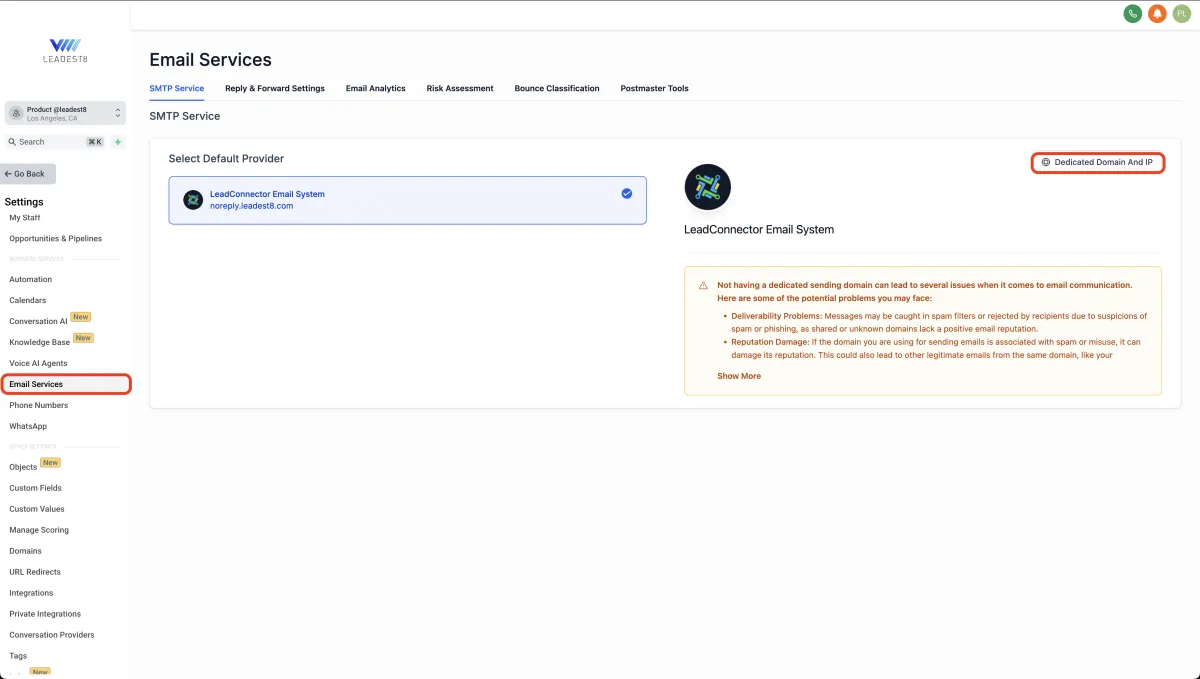
Navigate to Settings > Email Services.
Click Dedicated Domain and IP.
Click Create Dedicated Domain.
Click Add Domain.

Enter a subdomain prefix along with your owned domain (e.g., lc.mydomain.com).
Click Add & Verify.

Configure DNS records according to your registrar's instructions.
Click Verify Records.
Add the additional TXT record provided.
Click Verify Domain.
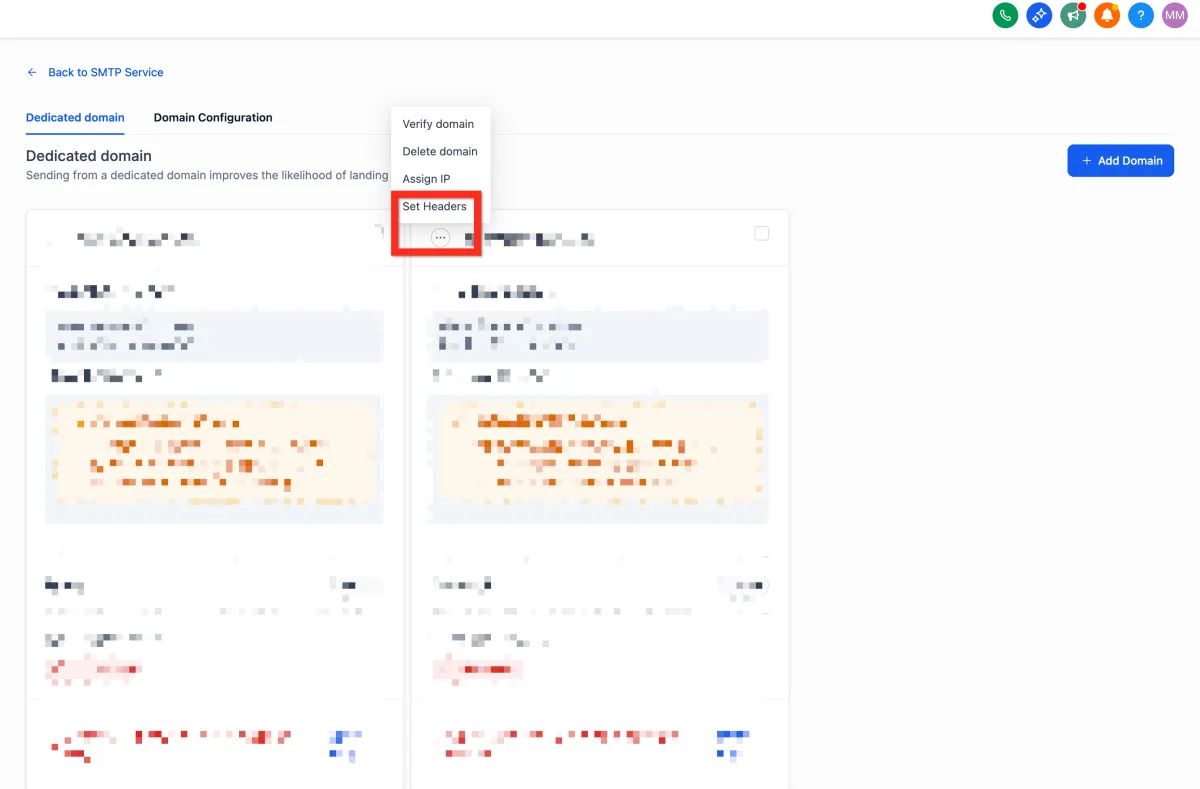
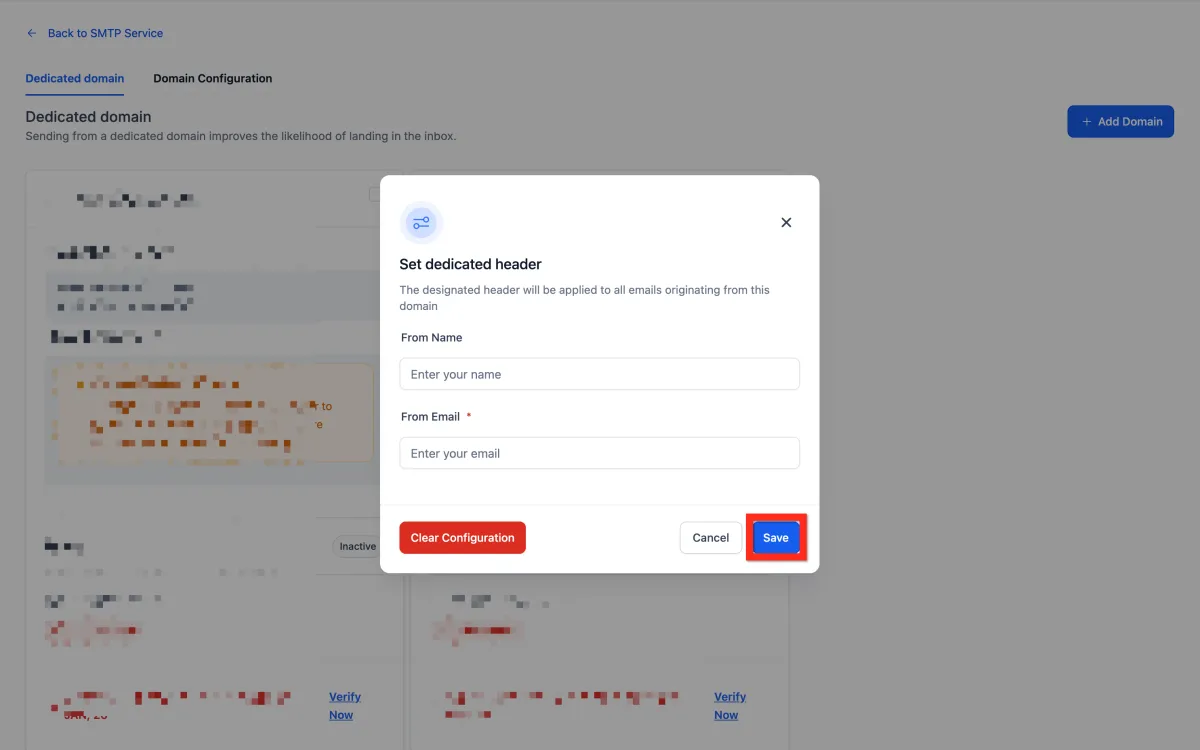
Customize your headers by clicking the 3-dot action menu and selecting Set Headers.
Enter your details (From Name, From Email).
Click Save
Next, you can explore setting up your phone service to enhance your communication capabilities.
Setup Phone
Want to offer instant, personalized interactions? Add phone numbers swiftly to your platform and be reachable in no time.
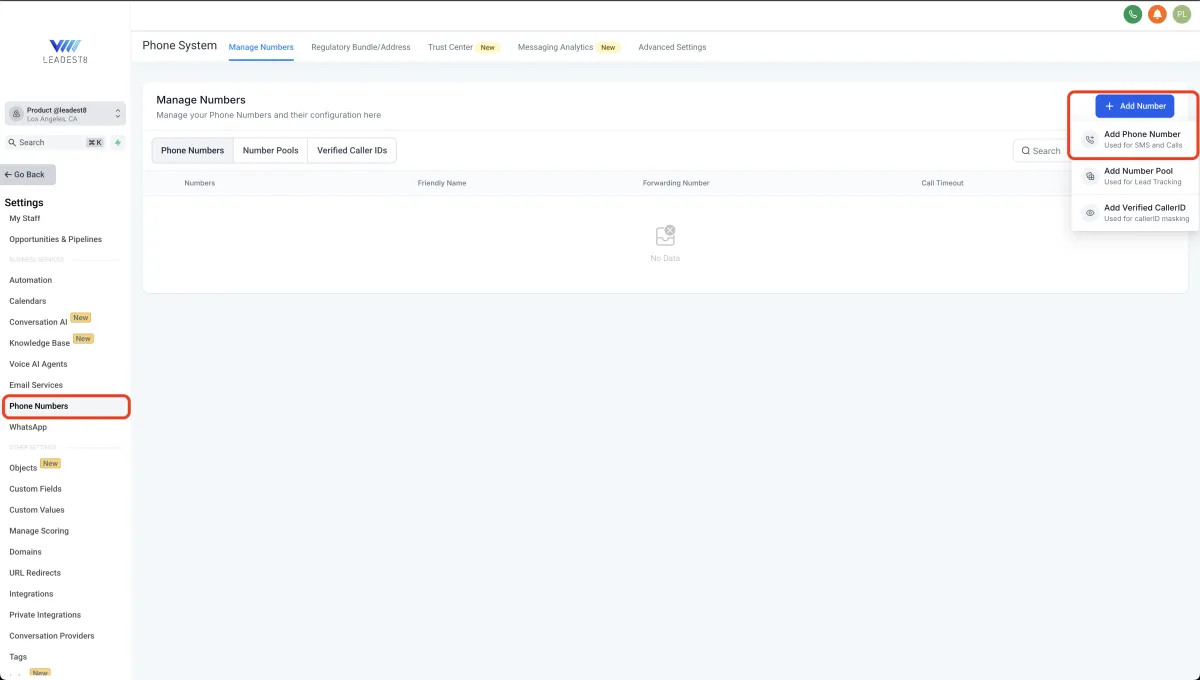
Navigate to Settings > Phone Numbers.
Click Add Number > Add Phone Number.
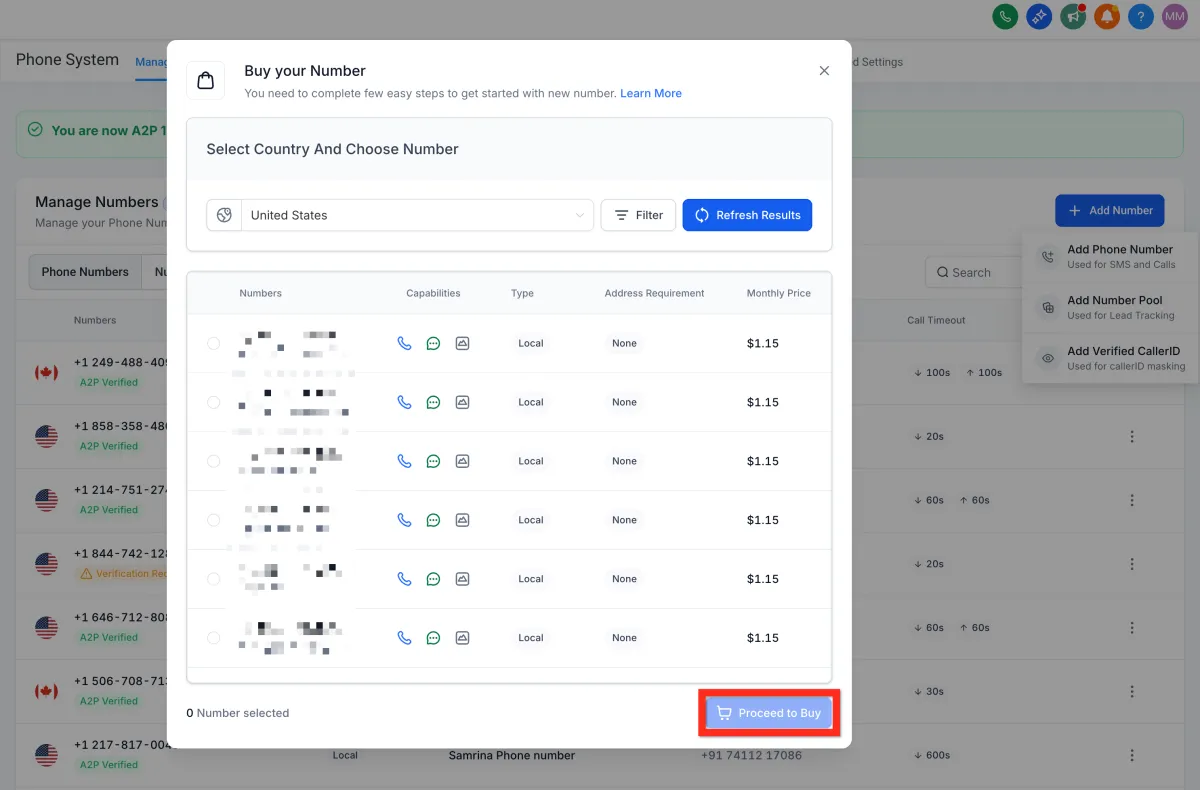
Filter numbers by country and area code.
Select your desired phone number.
Click Proceed to Buy.
Next, make sure you're ready to handle incoming calls efficiently by setting up call forwarding.
Forward Phone Calls
Stay responsive by directing incoming calls to the number that's most convenient for you:
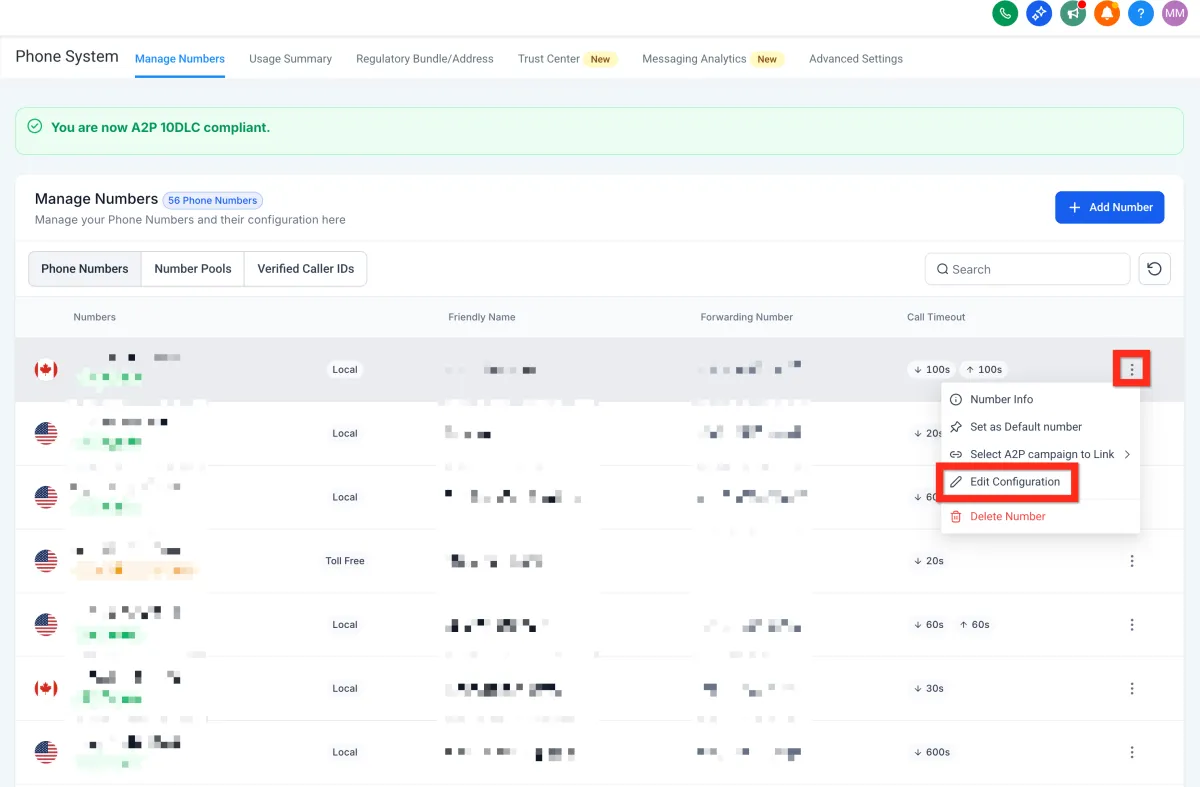
Navigate to Settings > Phone Numbers.
Click the 3-dot action menu next to your phone number.
Click Edit Configuration.
Enter your preferred forwarding number (e.g., your personal cell).
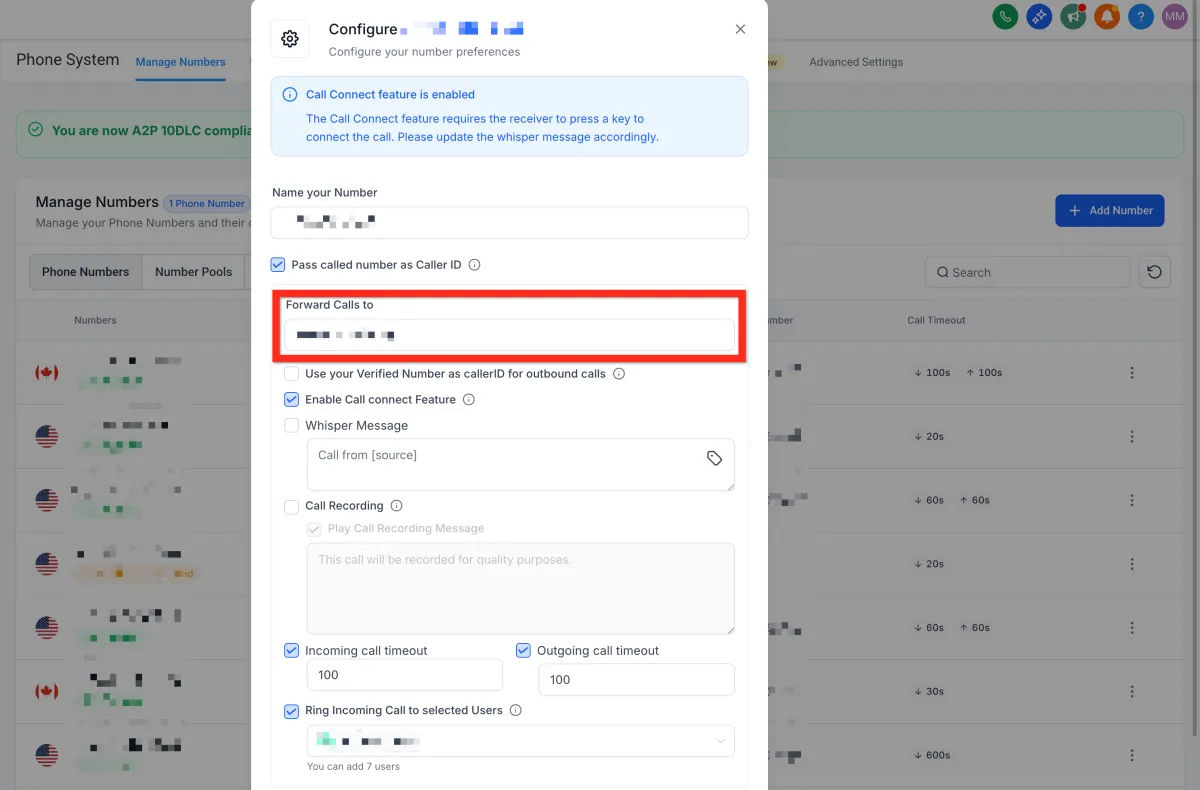
Click Save.
Next, learn how easy it is to initiate direct communication with individual contacts.
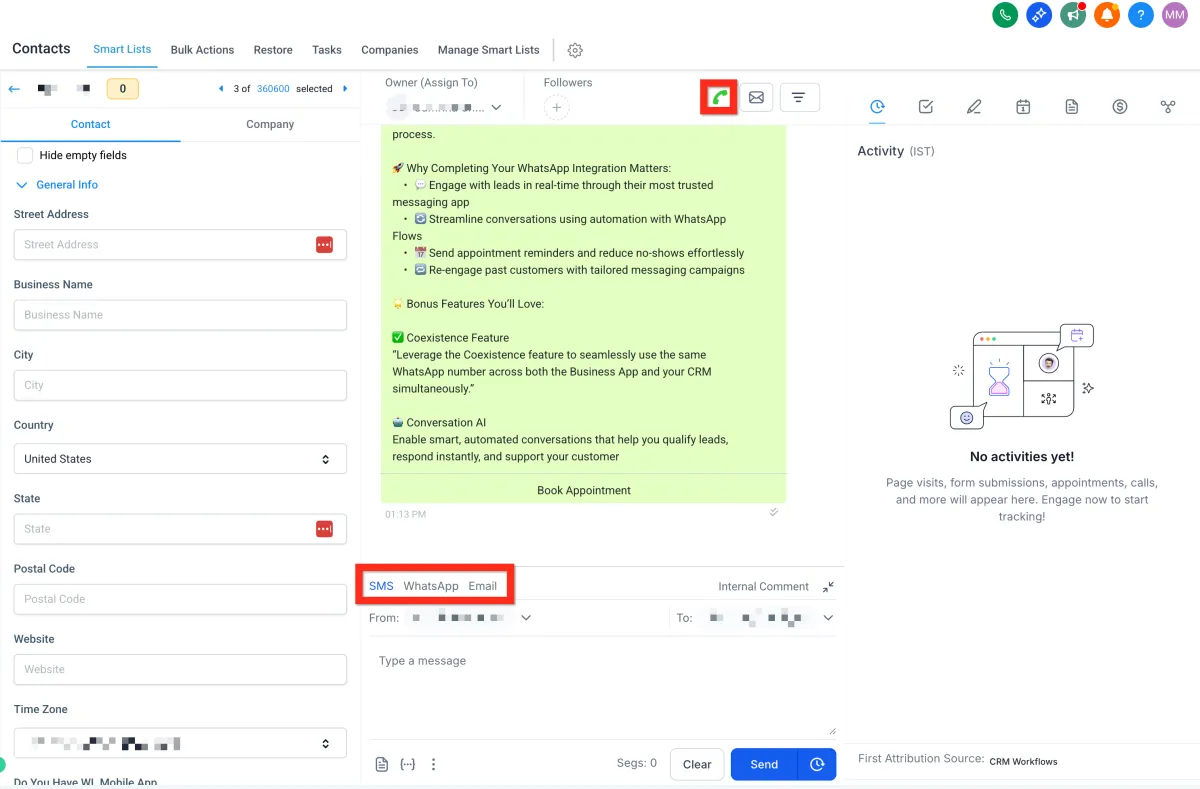
Contact a Contact
Quickly reach your contacts through their preferred communication channel:
Navigate to Contacts.
Browse, filter, or search to find the contact.
Open the Contact Card:
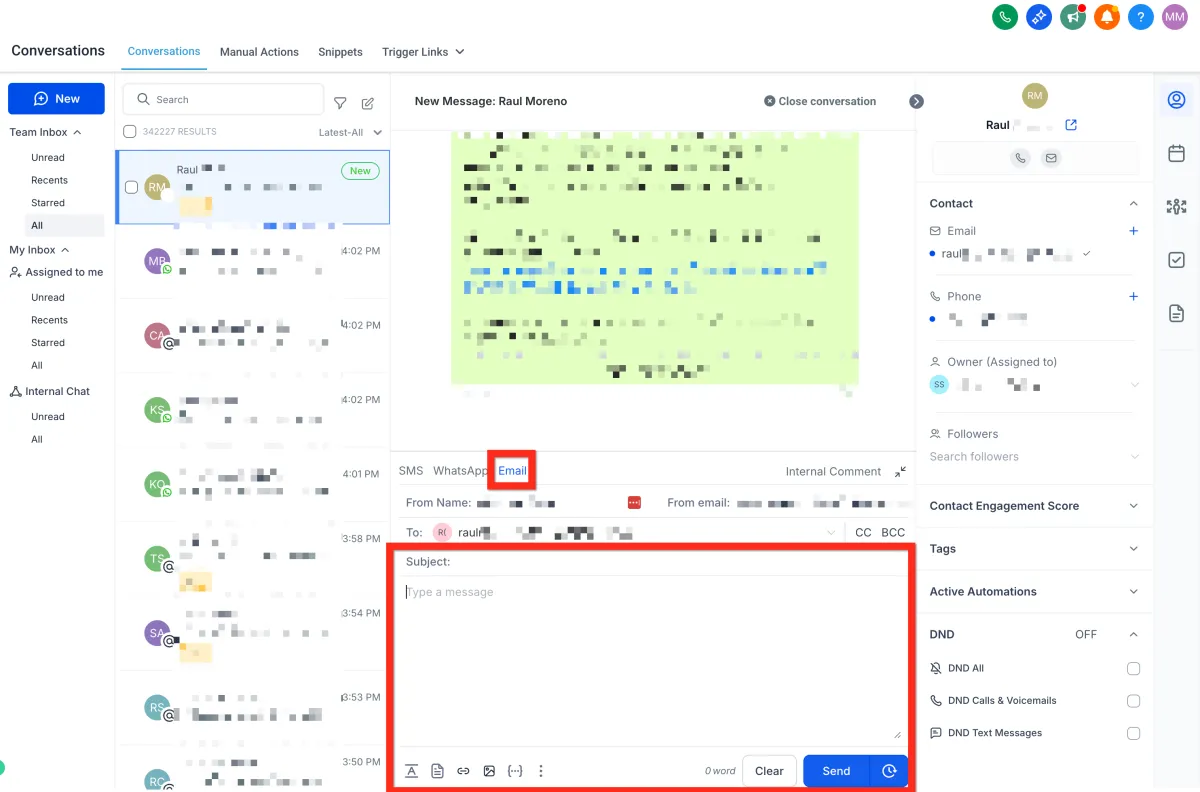
Call: Click the call connect button (green phone icon in the upper right).
SMS: Select the SMS tab in the message composer (bottom middle).
Email: Select the email tab in the message composer (bottom middle).
Next, boost your outreach effectiveness by communicating with multiple contacts simultaneously.
Contact Bulk Contacts
Maximize your reach efficiently with bulk communications:
Navigate to Contacts.
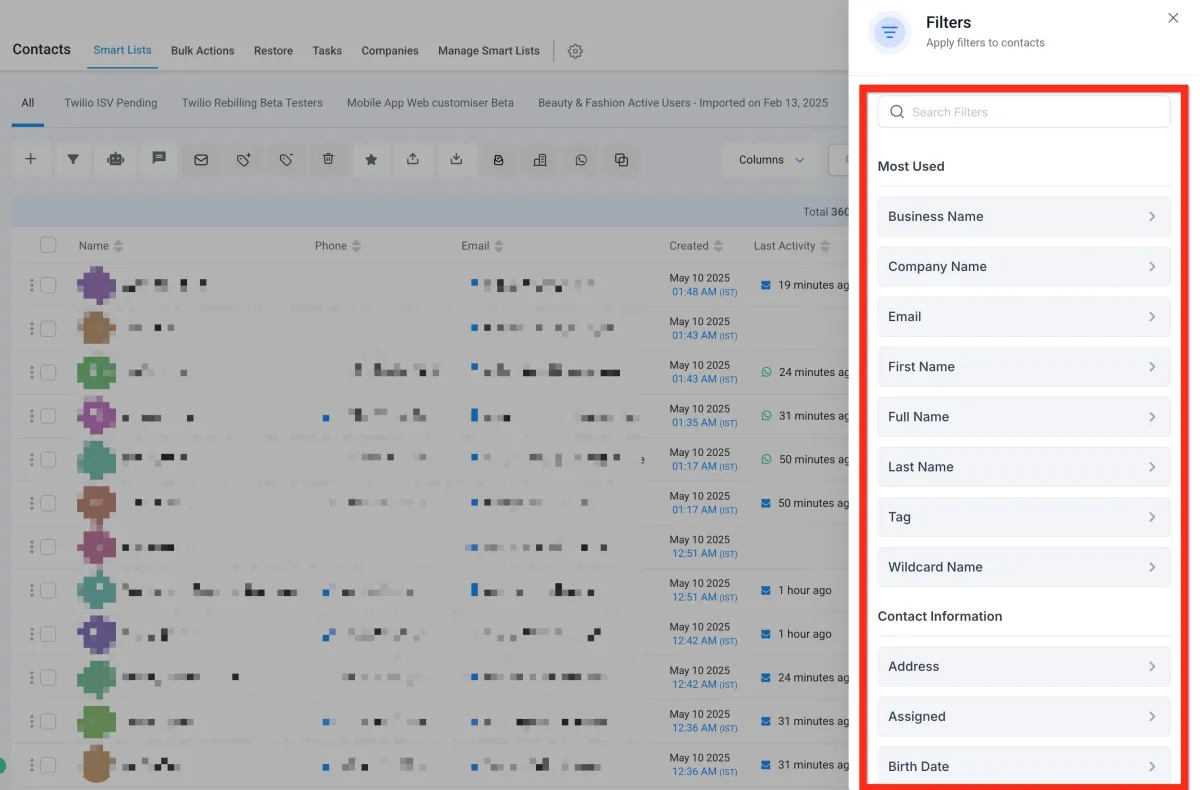
Open More Filters.
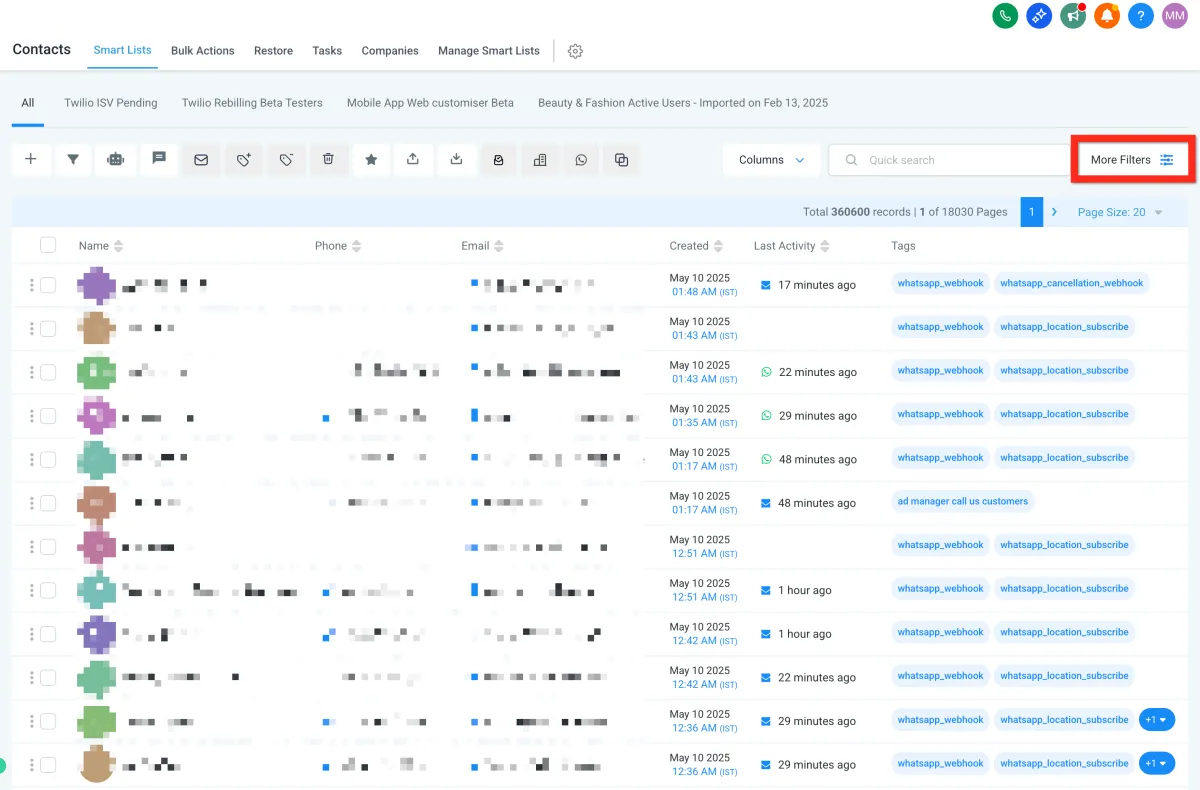
Filter your list to target the right audience.
Select the checkbox next to all desired contacts.
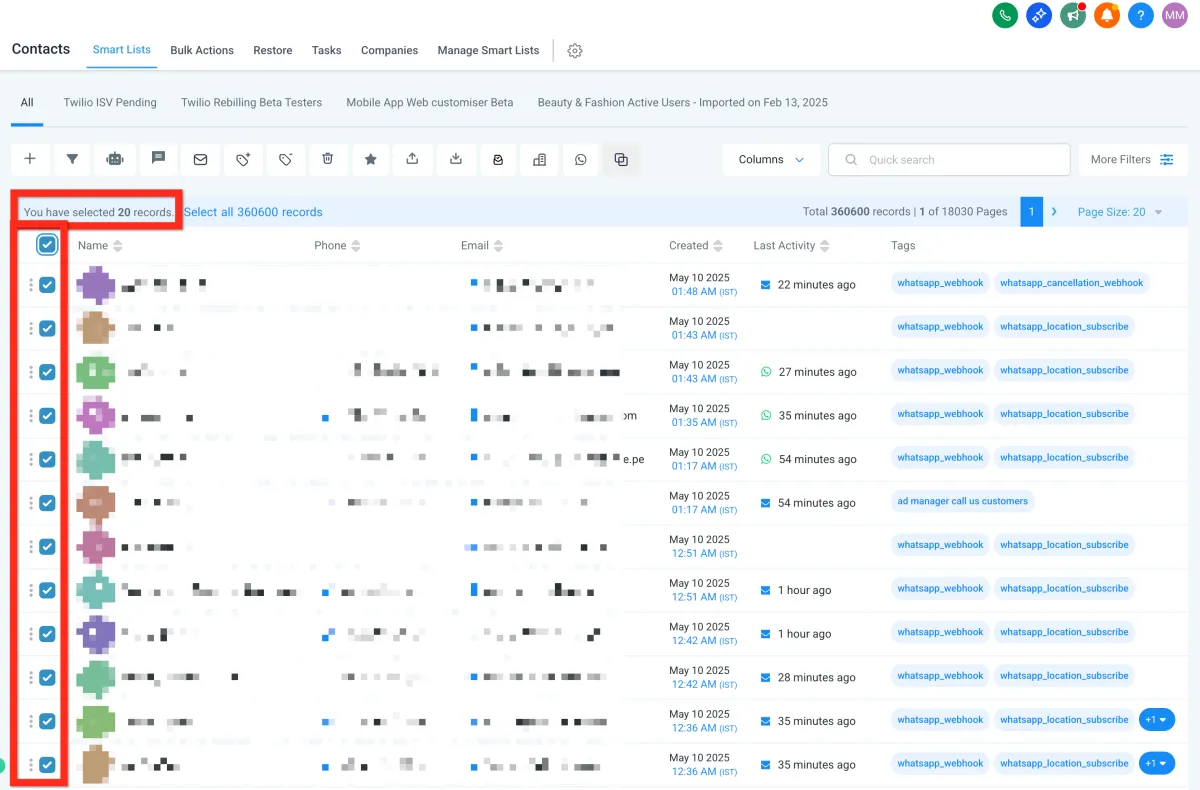
Choose your bulk action (email, SMS, etc.).
